
Whether you have just bought your first pair of hockey skates and you are wondering how to break them in for the first time, or you are more experienced but are looking for an in-depth guide, this is the article for you.
When buying hockey skates and preparing to break them in, it is important to remember that every player’s feet are slightly different so that no skates will fit everyone the same.
Shoe and skate sizes give a mere indicator of the dimensions of your feet but are no more than rough measurements. However, rough measurements are not going to give you the feel and response that you will require if you want to reach your highest potential on the ice.
No two players’ feet have the same size of dimensions, so no two players’ skates will ever be the same. Here is a quick but detailed guide that will tell you how to break in your hockey skates the proper way so that they perfectly fit your feet.
1. Picking the right skates
One of the most important things to ensure that your skates will properly fit your feet is to take the time to purchase the right skates initially. While this step may seem obvious, many inexperienced skaters make the mistake of rushing the purchase of their first skates and end up with an ill-fitting pair. It is especially important to take extra time if you have never bought a pair of skates before. Ask a sales advisor to help you fit the perfect pair to your feet.
Take the time to try on a few different pairs of skates before you commit to purchasing any. When you are breaking in your skates to make them right for your feet, you will want to have a pair that fit as perfectly as possible to start with. You don’t want to purchase an uncomfortable pair, to begin with as you cannot expect to transform an ill-fitting pair of skates into a perfectly fitting pair.
If you are unsure how to measure your feet for a new pair of skates, ask an experienced person to do so for you. Even if you do think you know what you are doing, it is not a bad idea to get a second opinion from a professional skater. Many people fail to get a proper measurement of their feet for skates and are often surprised at the comfort of the fit when they do so. Make sure that the skates are not too wide or too short from the top to the bottom of the foot. However, some players do prefer to have a tighter fit than others.
While choosing the right skates at the time of purchase probably won’t make them much more comfortable when you try them on before heating, it will help you out in the long run. Purchasing skates online is highly convenient, however, you will not receive the same service as in-store. If you buy your skates in a store you will have the option to try on a variety of styles while also receiving the help of a sales assistant to find the perfect fit.
Once you have bought the right pair of skates for your feet, it is time to begin breaking them in for the perfect fit.
2. Use Your Skate For a Long Time
Many skaters will argue that there is no better way to break in a new pair of skates than to simply pull on your new pair, tie up the laces, and start skating on them. Some say there is no other option to achieve the perfect fit for your feet.
However, this method of breaking your skates in is likely to be somewhat painful and uncomfortable. Skates are a lot stiffer than any pair of boots, so you will probably experience blisters and painful ankles for at least a few sessions.
Normally, if you choose to break in your skates through this method, you will start to feel more comfortable in them by your fifth or sixth skate. So don’t expect to be skating competitively in them for a while at least.
3. Bake Your Skate
One of the most popular ways of breaking in a new pair of skates to ensure they fit your feet perfectly is to bake them, perhaps in your own oven. However, it is important to remember, as mentioned earlier, that you cannot transform an ill-fitting pair of skates that were not properly measured into something perfect. Make sure to buy the right pair of skates first before you try to bake them.
1. Bake In-store While Purchasing It
If you purchase your skates in a shop, the seller may offer to bake the skates for you before you take them home. If you are ready, you have the right socks and you have enough time to spare, choosing to have your skates baked in the store can be useful. Having your skates baked by a professional will ensure that it is done correctly.
However, many people choose to buy their skates and mold them at home by baking them in their own oven.
2. Bake It At home: How To DO IT?
If you have chosen to buy your skates in-store and bake them at home, here is a detailed guide on how to safely and properly do so. If you are a younger skater, it is important to get your parent’s help and permission when you are intending to bake your skates at home.
It is also important to check that your skates are thermoformable before you put them in the oven. Most skates are but some are made of carbon composite and need to be baked in a certain way. Ensure to check your manufactures guidelines to avoid damaging your expensive skates.
1. Temperature
When you are baking your skates at home set your over to around one hundred and eighty degrees Fahrenheit or eighty degrees Celsius. Once your oven has reached the specified temperature, turn it off, and don’t worry, your skates will not need to be in the oven for that long. The oven will maintain its heat for at least ten to fifteen minutes if the door is closed.
Oven temperatures can often be inaccurate, so to ensure the oven is at the perfect temperature, place a cup of water inside the over and measure the temperature with a thermometer for an accurate reading.
2. Preparing the skates
Before you place the skates in the oven, loosen the laces so that you can remove them quickly and easily once you take them out of the oven. You don’t want to have to struggle to loosen the laces of a hot skate.
Some people prefer their laces to be waxed and while it is unusual that you have switched your laces for waxed once before baking your skates, make sure that you do not use waxed laces for this process. The wax can melt if you bake them and potentially cause damage to your expensive skates.
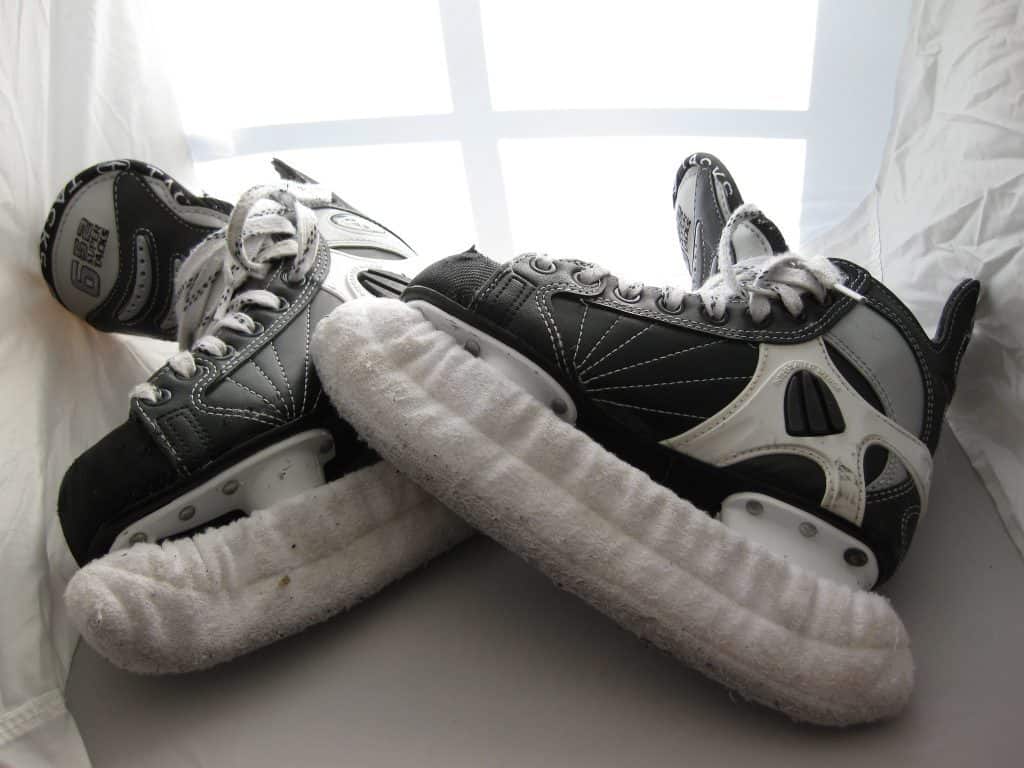
Make sure to remove the blade cover before you place your skates in the oven as there is a chance that the blade cover may melt in the hot oven. Also, ensure that you are careful when removing and handling the hot skates as the blade can get very hot.
3. Manufacturer’s guidelines
Before baking your skates, ensure that you check and re-check the temperature and method that your manufacturer recommends. Many will suggest placing your skates on a baking sheet so that your skates don’t take on the grooves of the oven shelf. Sometimes the manufacturer’s recommended temperature and baking time will vary.
Baking directions
Place the skate or pair of skates in the oven depending on the space for around four to five minutes. Make sure to keep an eye on them and don’t leave the room and forget about them. After about four to five minutes, carefully remove your skates from the oven, and squeeze them. They should be much softer than before you put them in. If they are still not soft enough, put them back in the oven for about two to three minutes before testing them again.
Make sure not to leave the door of the oven open when you are taking the skates in and out of the oven as you do not want the temperature to change too much at this time.
Once your skates are out of the oven, it is time to put them on. Make sure you are wearing suitable skating socks, place your feet inside, and tighten the laces. Be prepared to sit around with your skates on for up to twenty minutes so make sure the television is on your you have your phone nearby. Don’t try to get up and walk around as the skate needs to shape to your foot when you are still, otherwise you can cause a lot of damage.
Also, make sure that you place a little pressure on your feet when they are in the skates. Try to sit with your feet flat with the blades on the floor. Your foot will spread slightly when you have your body weight on them, so avoid elevating your feet or allowing them to dangle while your skates are cooling.
If you want a bit of extra space in your skates, make sure to stand up for the twenty minutes of cooling time so that your feet can spread slightly more.
4. Pumping
Many skates can be pumped up so that they mold perfectly to your foot and often you will still be able to also mold these skates with heat so that they are as comfortable as possible. If you have cooked skates that do have a pump system, make sure that they are completely deflated before you place them in the oven. Also, avoid pumping them again for at least twenty-four hours after they have been in the oven.
5. Re-heating
Most skates can be reheated several times without any problems. You should usually be able to heat your skates two to three times without causing any damage. Re-heating your skates can be useful if your skates haven’t formed perfectly after the first try. However, just make sure that you have allowed your skates to cool for over twenty-four hours before you reheat them.
Also, avoid getting into the habit of re-heating your skates often as they are usually only designed to be formed or heated once or twice. If you continue to do so, you may start to damage the padding in the skates as well as their structure.
6. Cooling
If you have the time, let your skates cool for twenty-four hours after baking. However, if twenty-four hours is too long, you may be tempted to help to speed up the process. If you want to try out your skates that evening, you may want to put them in the fridge or freezer to lessen the cooling time.
However, it is usually not recommended to try to cool your skates in the fridge or freezer or even placing them outside in the cold. The material that makes your skates thermoformable needs to cool down slowly and rushing the process can cause your skates to become brittle and prone to breaking. At the very least, check your manufacturer’s guidelines regarding cooling your skates.
7. Skating
Once you have heated and cooled your skates for twenty-four hours, it is time to use them on the ice. Your skates are never going to be perfectly broken in until you have used them on the ice for at least one or two sessions, even after heating. So, if you have a skating competition coming up make sure to allow enough time to heat and cool your skates before having one or two practice sessions on the ice.
To sum up…
Whichever method you decide to use to break in your new pair of skates, you should notice the difference within a few skating sessions. Your new and perfectly fitting skates will help you reach your potential on the ice. If you have heated and molded your skates and you have used them for more than ten sessions and they are still uncomfortable, they are likely not the right fit for you.

Leave a Reply